Thursday, March 23, 2006

Heart of Worship

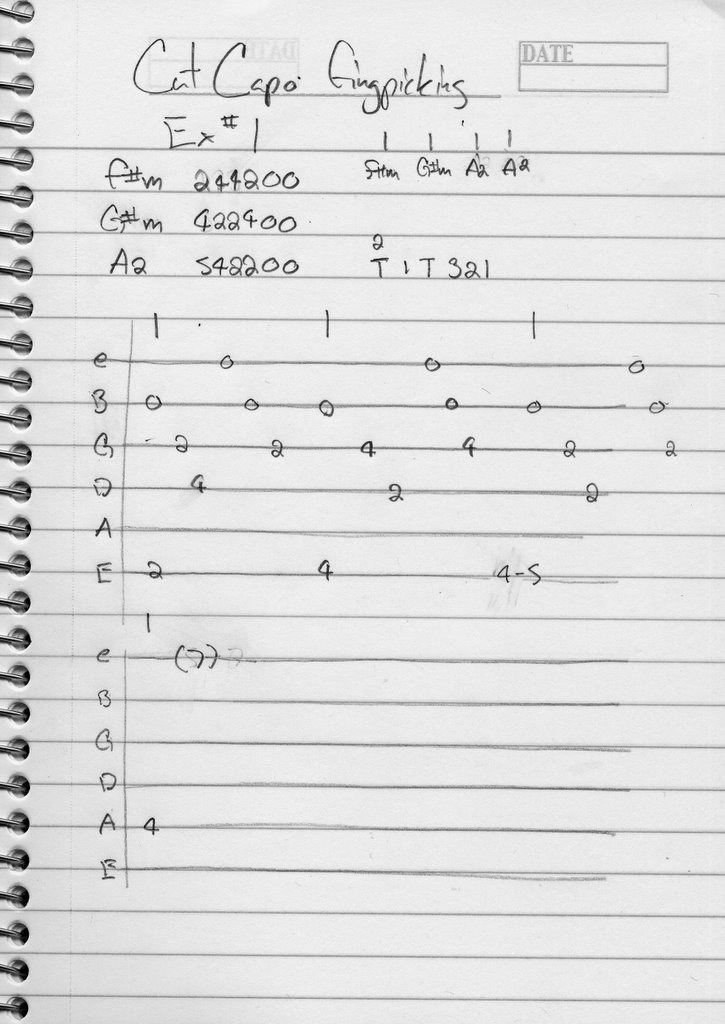
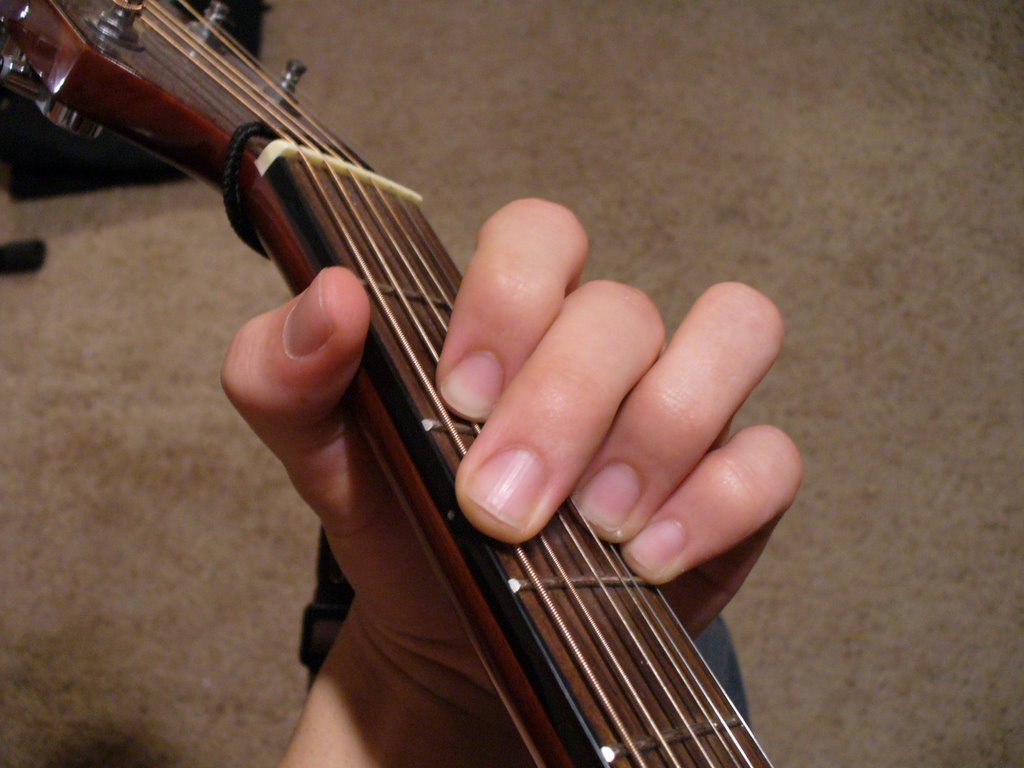
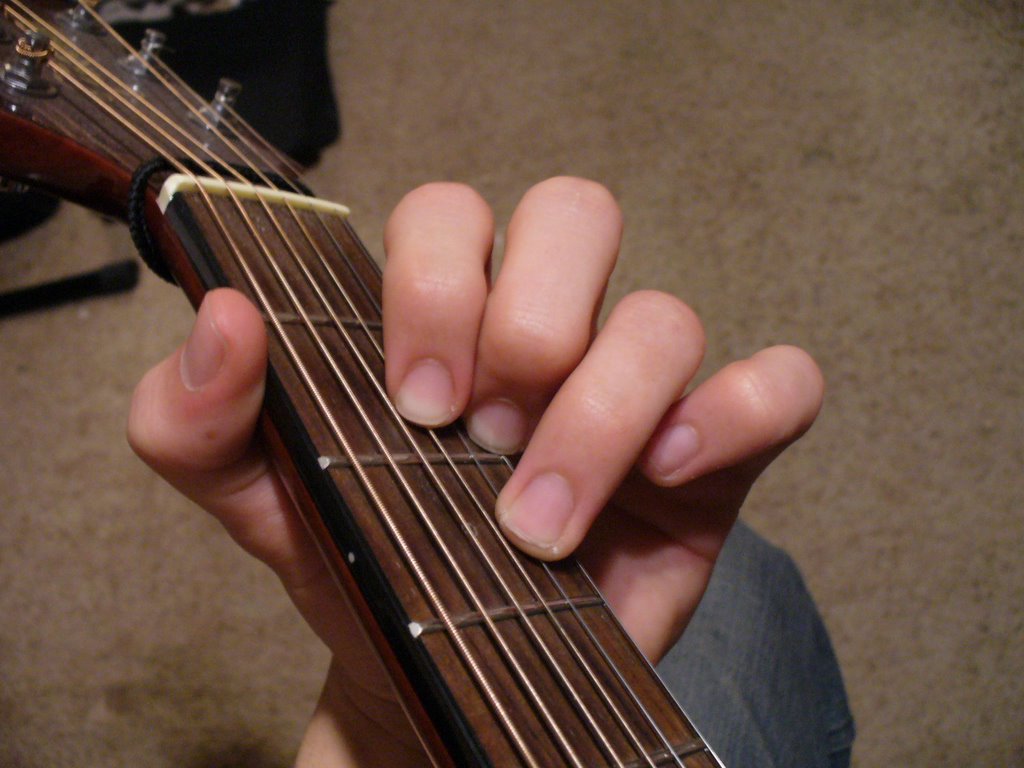
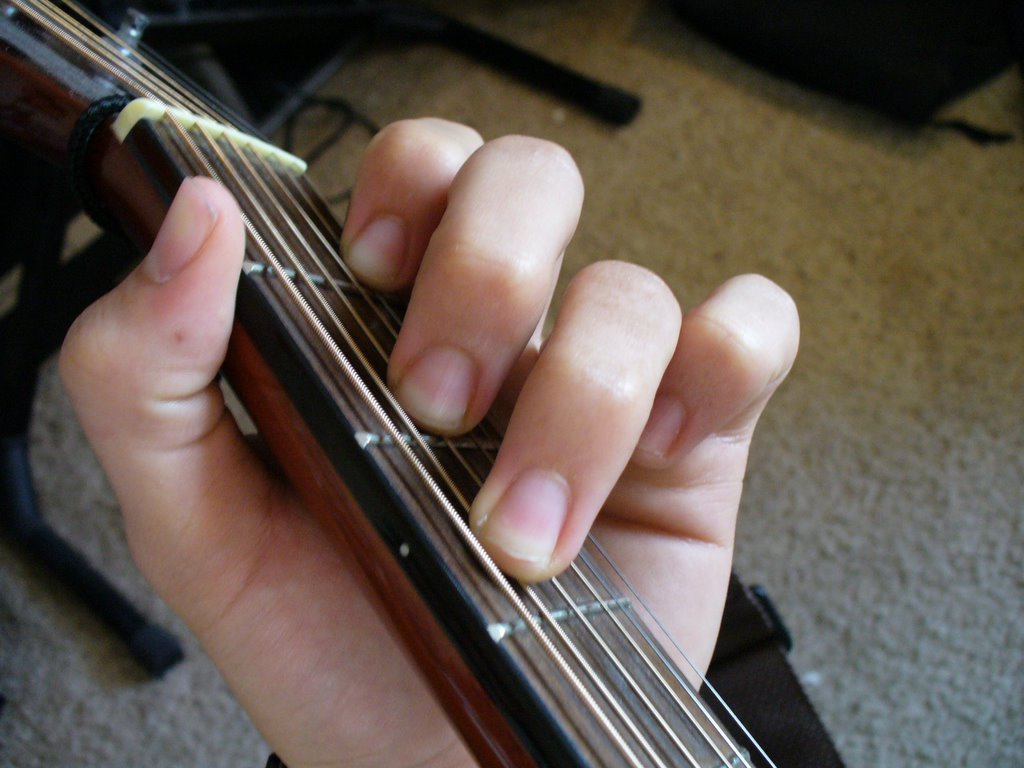
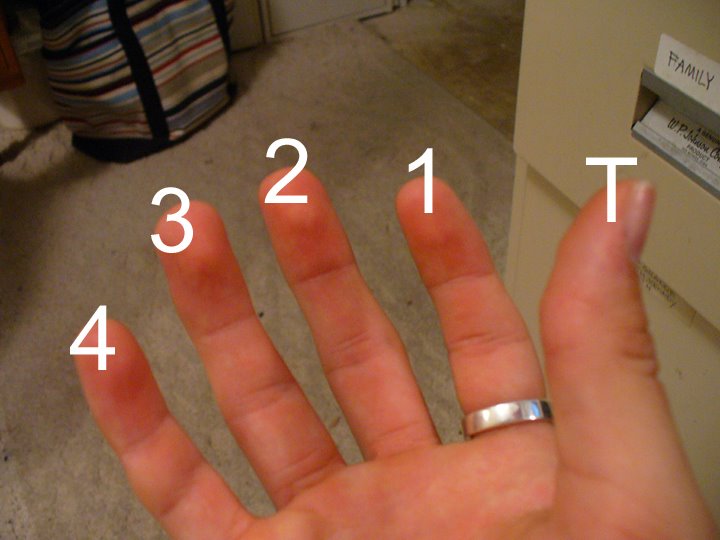
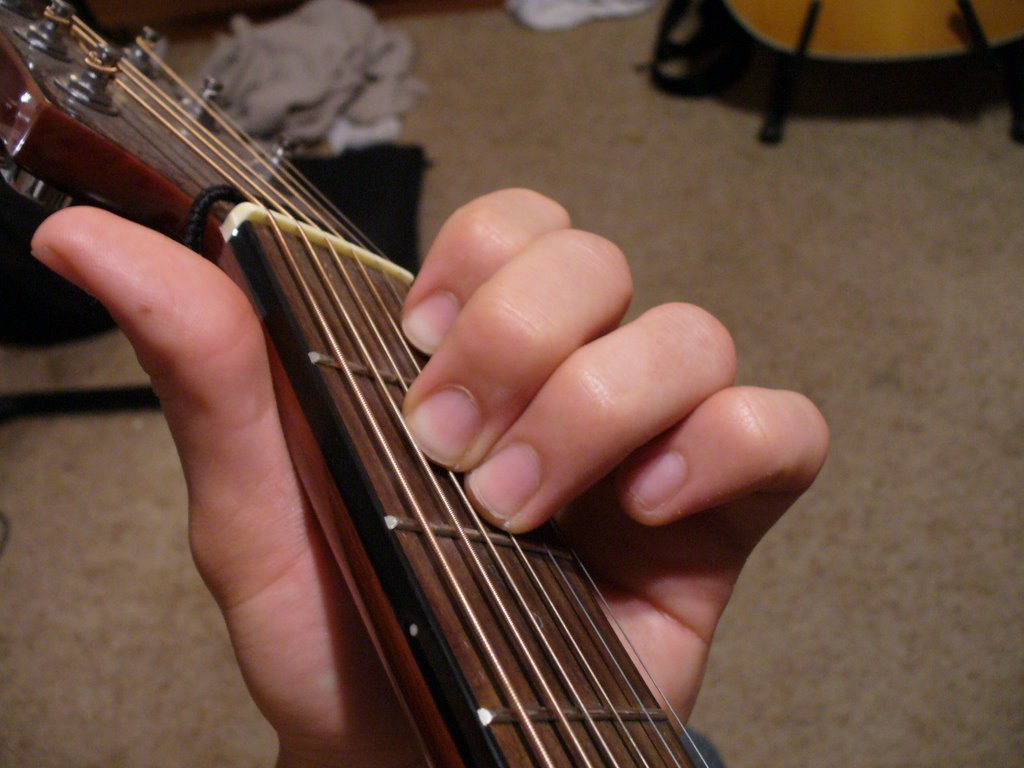
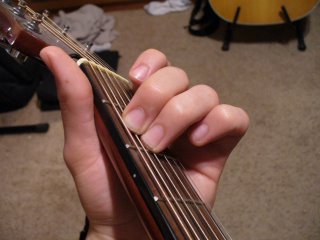
My seconf favorite song! These are probobly favorite b/c there the easiest to play, haha, specialy with a cut capo for wich this song is transposed for.

Heart of Worship

E ---------------B -----------------------A
When the music fades and all is stripped away
-----------------B
And I simply come
E ---------------B -----------------------A
Longing just to bring something that's of worth
-----------------B
That will bless Your heart

A --------------G#m ---F#m
I'll bring You more than a song

For a song in itself
A ---------G#m -------B
Is not what You have required
A ---------------G#m---F#m
You search much deeper within

Through the way things appear
A ------------G#m ---B
You're looking into my heart

E ---------------------B
I'm coming back to the heart of worship
--------A
And it's all about You
------------B ---E
All about You, Jesus
E ----------------------B
I'm sorry, Lord, for the things I've made it
----------A
When it's all about You
------------B ---E
All about You, Jesus

E -------------------B ---------------A
King of endless worth, no one could express
---------------------B
How much You deserve
E -------------------B ----------------A
Though I'm weak and poor, all I have is Yours
---------------------B
Every single breath

Amazing Love

Man i love this song so much! And its so easy to play with a cut capo! I havn't posted in a long time b/c of work and all this other stuff, but that gave you guys enough time to practice right? Well here is the tab of Amazing Love.

Keep an even paced strum and as you strum try and sing the words right when the chords appear above them. I did my best as to placing them on beat above the corisponding words. Have fun and worship God!

Amazing Love

E ------------B
I'm forgiven, because You were forsaken
E ------------B
I'm accepted, You were condemned
E ----------------------B
I'm alive and well, Your Spirit is within me
A -----------B------------ E
Because you died and rose again

E -------A
Amazing love, how can it be
E ----------------------B
That You my king would die for me?
E -------A
Amazing love, I know it's true
E ---------G#m -------B
And It's my joy to honor You

A ----------E
In all I do, I honor You

E -----G#m -A --E ----G#m -A
You are my king, You are my king
-------E ----G#m -A --------E -----G#m -A
Jesus, You are my king, Jesus, You are my king

Wednesday, February 08, 2006

Finally some videos!

OKOK, exciting news... I finally found a place where i can upload any sized file I want, wich meens I can start posting videos of fingerpicking patterns, chord progressions and/or song i'v written or wnat to teach you!!! This is very exciting b/c now yall can finally hear some of my work!!!

Well I have tommarow off of work so i'll be doing alot of recording and writing tommarow... but untill then, God bless!

-gabe

Tuesday, January 24, 2006

Lessons, mono e mono!

If your wanting person to person one on one lessons with me email me and we'll talk about all the details (money, time, locations). For those that live really close or in New Braunfels, Tx. only please... haha, no one from Oregan, thanx.

I'll basicly be teaching on the same level as i have been here, but alot slower and even more detailed! You WILL learn tons of chords, fingerpicking/classical guitar and how to strum and play praise/worship songs!

It is Christian based!

EMAIL ME if you have any questions!

Monday, January 23, 2006

Cut Capo Basics! (para bruce)

Ok... i feel real stupid b/c i don't remember what i covered on the last lesson about cut capos, but if i know myself as good as i think i do then i probobly explained what a cut capo is and what its used for... I havn't posted anyting in a long time b/c i got a job finally and jobs tend to suck all your time and free energy away.

Anyway, i think I already posted three cut-capo chord for yall for the finger picking... well guess what, i'm gana post em again just to refresh everyone.

Oh and the "x" meens to mute and or don't hit, or that string isn't used in that chord. you mute a string by placeing an unused finger and/or thumb on that string that u don't wnat to make noise. Don't press down just touch so it dosn't resonate and make a noise... it'll make a muffled "thdd" sound.

One more thing, i highlighted the Roots with yellow like always so you can se where the name comes from!


So... we'll start with an A2 that looks like:
542200
F#m
244200
G#m
422400
C#m
x46600
D2
x54230
B
x24400
E
022400
Yippy! just practice those and see where the names come from and how... then u got it!
I must really retreat back to bed now... sheesh this job has gotten me tired!

Monday, January 16, 2006

Cut Capo fingerpicking!

First off a cut-capo/short-capo/special-capo is a divice you attach to your guitar neck that holds down strings 3, 4, 5 for you. People use it b/c it makes alot of the more difficult chords seem alot easier, and it makes those simple chords a ton alot easier!

This is what one looks like:

If you don't have one i think you should consider getting one as soon as possible! Or just get your full capo and cut it down with a razor so that it covers strings 3, 4, and 5. Thats what i did and it worked very nicely! This is a full capo if you didn't know...

Now the thing with cut-capos is that you have to have it 1/2 a step up from the full capo like that in the picture or if your not using a full capo then it has to be on the second fret for it to work properly. I don't know why, it just does... if you don't believe me then try it anywhere else and tell me when you find something that dosn't sound like nails on a chalk baord!

Anyway, i'll be posting a tab of a quick little freestyled song i wrote with three easy chords. Here are the chords of this song, and the names:

F#m: 244200

G#m: 422400

A2: 542200

I highlighted the roots for yall again so you can kinda understand how they get there names. Ok so know for the tab! Well, i think i'm going to show you my first sketch of it in my small spiral that i write guitar stuff in. You can see where i wrote out the chords, the time signiture, the fingering for the pattern with your right hand and the tab itself.

Here is the tab typed out, this will be a bit easier to read and understand.

F#m G#m A2 A2

e----------0-------------0--------------0--------(7)--
B--0---------0---0---------0----0--------0----------
G----2---------2---4----------4----2--------2---------
D-------4-------------2---------------2---------------
A-----------------------------------------------4-----
E--2--------------4--------------5--------------------

So... you can now see the chords placed on time wich is 4/4 time, seeing it this way looks tuff, but its quite simple once you take it apart... The whole song is centered on the roots, or the bass line, and the rest are just rolls going downward, u see it now? Just try it out and see what you think... Get to the point where you don't have to think about it... don't worry this may take severl days, weeks, even months before you can be able to do this real smooth... this exersice is just to get your fingers used to there rightful places. REMEMBER the thumb has control of all the bass strings and the three other fingers stay on there strings all the time!

2
T1T321

The (7) is a harmonic... its a technique when you touch a certain part on a string without pressing down, you pluck it and release and it makes a resonating frequency throughout the string. You don't have to try this if you don't want to. It takes lots of practice to get.

Just take your time and go through it slowly! In the next lesson i'll be posting tons of pictures of chords, all the different kindas and stuff... it'll be way fun!

Well keep workin on your chords and strumming, you got to find your own rythum... honestly i'm still trying to find mine, haha.

<======(==@ (sword) gabe

Sunday, January 15, 2006

All the chords possible... impossible!

Go here for the hugest chord list ever seen by any human ever to live!

Even Jesus uses this chord sheet!!!

http://www.christianguitar.org/chords/chordchart.txt

-gabe

G forces anyone?

I learned two new G chords just recently so i guess i'll share them with you, haha.

Ok, we all know the normal G chord, looks like
The new chord is a Gsus2, this one looks like:
Just move your pointer finger down the the 3rd (G) string on the second fret (C# note). "sus" is short for suspended. Kinda like spiderman suspends himself, but not really... So you'd say, Gsus (suspended).
And the second one has two variations of it but they sound axacly the same, just two different ways of playing the. This happens to alot of chords once you start exploring the notes and roots and all, you'll find several ways of making the same chord, alot of fun by the way!
These are both a Gsus.
Now i'd kinda like to explore to why these chords are the same... And i'll do so with those nifty guitar note diagrams. Ok so this first one is the first picture of the Gsus. OH WOW... would ya look at this... I learn so much when i make these diagrams, its so much fun! OKOK... now heres the picture:

Notice the notes that make up this Gsus chord. G,B,D,G,C,G, you can see that the G is the root hence its name.

Now look at the second Gsus.

The notes that make up the second Gsus goes like this: G,D,G,C,D,G. Lets put these patterns right on top of eachother just to see exacly whats going on, lol... b/c i'm still alittle confused abuot why and how... i'm learning as i type. I feel like i'm disyphering a hidden language or somethin!

Gsus: GBDGCG

Gsus: GDGCDG

WOW, you see oh it kinda slides down... like this:

Gsus: GBDGCG

Gsus: GDGCDG

If you taek the B out in the first Gsus, and switch out the G from the first and the D from the second then get the exact same notes! I have no idea what this meens but its pretty darn cool huh... wow. Well i guess i'm gana research why this happens and what it meens then i'll post it on here and mabey fix this lessons so where not all left feeling like we found something that has no meening at all, haha. But i loved this lessons!

I think i'm gana do this to a few more chords with different positions just to see what happens and see if theres a pattern wee can figure out together.

Well this frig'n awsome lessons is agurned!

<=====(==@ (sword) gabe

Thursday, January 12, 2006

A/C#

This one is an extreme finger stretcher... i don't expect any of yall just learning to get this down quite yet.

But anywho, heres an A/C# (A with a C sharp) tabbed

(1)e-------
(2)B---2---
(3)G---2---
(4)D---2---
(5)A---4---
(6)E-------


What you play lookes like:

C# is just 1/2 step up from a normal C... 1/2 step i guess can be represented by one fret. Flat or "b" is 1/2 step down from a note... like you'd say Ab (A flat).
Lets look at the guitar neck with all the notes on it like this:
Now lets look at the C on the A string (5th string)... since C has no b (i don't know why it just dosn't!) then 1/2 step down is a B, whole step down to A, whole step down to the G, whole step down to F and a half step down to the low E (since E has no sharp). Steps aren't required for yall to know but it is important to know they exsist.
well this concludes the lessons... if you can call this a lesson.
-gabe

Wednesday, January 11, 2006

D/F#


Now since we are starting to understand the notes on the guitar lets start putting extra notes on top of a normally playd chord... lets take a D, looks like:

(1)e-------2------
(2)B-------3------
(3)G------2-------
(4)D--------------
(5)A--------------
(6)E--------------

OK... now lets ad an F# in that! like this:

(1)e-------2------
(2)B-------3------
(3)G------2-------
(4)D--------------
(5)A--------------
(6)E-------2------


you say this chord like, D with an F sharp, D/F#!!!


Looks like THIS!!!


There are two ways of doing this chord... first i sudjest learning to rap your thumb around to the F# and do it that way like in the picture above... or you can do it like this tab:

(1)e-------2------
(2)B-------3------
(3)G------2-------
(4)D--------------
(5)A--------------
(6)E-------2------
this way looks like:


and this way looks like this... i don't like this one to much b/c it kinda tangle your fingers around alot... the lesser fingers you have on the neck the better.
This chord is a great chord to play before a G chord... try it out and see wat you think! and notice the bass notes... see how you progress from F# to G... then mabey you could go to an Am or C... its all up to you but you should start visualizing the roots progress wile you play guitar... thats key!!!

Monday, January 09, 2006

Homework #1


Now this is how real music is written down... but it has a tab for cheaters down below the music bars. Try this and memorize it! NOW!!!!!!!!

Fingerpicking 101

Ok... i didn't really wana get in to finger picking just yet but since i went so far into roots then i should at least give yall one or two patterns that roots play a key role in. And in understanding how to aply these roots in all your fingerpicking practice will help you get closer to being a pro soon!!!

Well we all should now know what a root is... or at least understand the basics of it. I'm going to tab out a pattern for yall that is quite simple and that can be used with any chord, just as long as you understand and apply the roots thing.


4/4
(1)e-------------2-------------------2-------------------2-----------
(2)B---------3------3------------3-----3-------------3-----3--------
(3)G-----2-------------2-----2------------2------2------------2-----
(4)D--0-------------------0-------------------0-------------------0-
(5)A------------------------------------------------------------------
(6)E------------------------------------------------------------------

No don't freak out just yet... once you take this diagram apart it is very very easy to read. Let me explain. Now you should recognize a few things already, the strings and there names on the far left. Now the numbers on the tab are the pressed strings you pluck at a specific time. The red highlighted part is called the time signiture... its like counting to 4 on a steady beat. one, two, three, four, one, two, three, four, one, two, three, four. Thos lines above the tab represents the beat... so watever note is under those lines you'd count in your head one (on the ling), two, three, fou and then start at one again once you get to the next line. This is a D chord if you havn't recognized it yet. And i hope yall remembered the small lesson on the finger names... were going to be using the right hand diagram this time, not the colored one like for chord formations. Remeber that the thum takes all three bass strings, the big E, A and D... it just so happens that most chord roots will lie on these three strings somewhere down the line. So if you keep to the rule that your thumb will pluck the top three strings, the bass notes, then you will start the pattern off by plucking with your tumb the D string. Then moving to the next string, the G string and pluck it with your pointer finger or finger 1. Then pluck the B string with your middle finger, finger 2 and so on and so one and then revers it and go back up... it'll be like in a wave shape. It might be alittle aquward at first, but it takes time for your muscles to memorize these short movements. Oh and by the way this pattern is called a roll... and since we have a D chord it'll be called a D roll...

Say you wana do this with the C chord. the tab will look like this:

4/4
(1)e-------------0--------------
(2)B---------1------1----------
(3)G-----0-------------0------
(4)D---------------------------
(5)A--3--------------------3---
(6)E----------------------------

Or you could include all the finger used in a C chord and do this:

4/4
(1)e---------------------------
(2)B------------1--------------
(3)G--------0------0----------
(4)D-----2------------2-------
(5)A--3------------------3----
(6)E---------------------------

This pattern will look like this: TT121 (thumb, thumb, pointer, middle, pointer and repeat yill the cows come home!)

^On this one your thrumb will pluck two strings one after the other, the A and then the D strings. Just take it slow and make it flow like butter.

This pattern can easily be written out as T12321T... thats basicly telling you what fingers to pluck in what sequence... you should know by now the names of each finger on your right hand. So in using that knowledge you can basicly do this roll with any chord you want! You don't have to hit the root with your thumb all the time... but it is nice let the listner hear what the root is, its just pleasing to the ear. In knwoing and applying that try this pattern: T21312T... take you time... take alof of time! lol... the only way I got these was hours of rolls, just go through all these chords you now and know and practice your rolls with each one hitting the root and then rolling watever strings you want in a constant sequence.

Have fun finger picking!


T12321T

Sunday, January 08, 2006

How chords get there names!

This is the fun part, this is when guitar starts to make just alittle more sence then before... This was one of my favorite parts about learning guitar. Ok, we're going to learn why you call an A chord an A... where does that A come from. Or an F... F#? What tha heck... C#m, where do they get these crazy names from anyhow? Where let me explain as best as i can.

Oh, and right now i am teaching all what i know, its limited but i want all of yall to be at the point where i am now, i wnat all of you guys to know exaclty what i know... so here we go.

Now this is the only way i can explain this as easy as possible so all of yall could understand, so please bare with me if it is confusing... But this is your guitar neck, the brown bar at the top is the very top, the end away from the body and the notes above are the names given to the corrisponding strings (just like the tabs but instead of horizontal, this picture virtical). The Blue lines are frets, nothing special yet, just labeling things for ya. The red line is the fifth fret. All the letters and stuff inbetween the frets are the notes, they reprsent the names that are given to each position of the strings when they are pressed at certain frets. *phew* that was alot... but it gets easier, lol.


It would be awosme if u could memorize this but i'm in no way expecting any of yall to do so... all you should do us try to consitrate on a few notes at a time and try to not just know but to understand what i'm explianing.

Now this picture is a representation of an E chord, recognize the chord and see it in your head... The green dots are where your fingers are. And the Yellow dot is called the bass note, or root note. Notice the root note is the "E" note... BOOM, thats where tha name of the chord comes from.

Lets try the D chord... the D chord finger placement will be represented by the green dots and the root will be highlighted with a yellow dot!

Starting to see the pattern? But notice on this one the root is one of the notes pressed down... but it dosn't make a difference. The C note is pressed and it is also the root wich gives it its name the C Chord.

Oh, the F chord will be fun to show, this chord was the starting of me understand how and why chords got there names! SEE!!! the F note is pressed in tun gives the name of the chord!!!

If u still don't get it staring at the screen won't help... try these things with the other chords that you now know... see if you can get it that way. Find th way you learn things best and stick with that wether it be by these lectures, pictures or you reading alittle and trying out for yourself...

GOOD LUCK AND HAVE FUN WITH ROOTS!!!!!!!!!

Betta try it NOW!!!


B is alittle more difficult, but it is needed for you to know... So if this one is even tuffer for you then continue working on the ones that you know are equipped with and you'll be able to work up to this one... Don't fret, haha...

B tabbed:

(1)e----2---------
(2)B----4--------
(3)G----4--------
(4)D----4--------
(5)A----2--------
(6)E----2--------


Looks like:
Learn by trial and error...

Fret not, but acually do...


okok... now here comes the baring stuff, sorta tuff but by now your fingers should have strengthened alittle... if not then don't worry about it, i don't expect any of yall to go through this whole tutorial all at once. "whats baring" you ask, well its when you place your finger down on the neck over the strings to cover more then one string at a time....

Well work on an F wich looks like this tabbed:

(1)e---1-----------
(2)B---1----------
(3)G---2----------
(4)D---3----------
(5)A---3----------
(6)E---1----------


And it should be played looking like this:


Make sure your baring finger is pressed firmly down on the E (thats now an F note wich gives it its name) string and on B (thats now a B# or Cb) and e (now is an F) string... It'll take time to get but don't fret, you will get it sooner or later it Jesus name! Just keep working on the chords you can do and your fingers will strengthen!

Keep it up 'ol chap

Greasy fingered punk...


G is tabbed:

(1)e------3---
(2)B------3---
(3)G----------
(4)D----------
(5)A------2---
(6)E------3---


Fingered looks like:

Deasy (easy...)

D is pretty simple:

(1)e-----2----
(2)B-----3---
(3)G----2----
(4)D---------
(5)A---------
(6)E---------


What you play looks like:


C is for Cookie

C tabbed looks like:

(1)e-----------
(2)B----1-----
(3)G----------
(4)D----2-----
(5)A----3-----
(6)E----------

what you play looks like :


Tuesday, January 03, 2006

Finger Finatic

Ok, I guess I should strieghten out the finger deally before we get any farther... I have dicided to color code your right hand so it'll be easier to read the tabs. I'll just asign certain colors to your left hand fingers.


So here we go... Left hand...


Thumb is PURPLE
Pointer finger is RED
Middle finger is GREEN
Ring finger is YELLOW
Pinky is BlUE


Not that hard right? You don't have to memorize this, its just here if you need it for reference like if you don't undestand how to finger a chord or don't understand the picture... or possibly don't understand anything ever about anything... j/k...


Oh and now for the right hand, your strumming and/or picking hand!

Your thumb will be "T"
Pointer "1"
Middle "2"
Ring"3"
Pinky "4"
Pretty self explanatory by the picture anyway. This is just for futrue reference... also Its been on my mind to put it up but i couldn't wait any longer... haha.
Now one thing to remember if you guys want to start finger picking is that there a a few rules you HAVE TO go by to make perfect practice. Your thumb will ALWAYS (99% of the time anyway) take control and pick the top low end strings, the fat ones, E A and D. And your three other fingers, fingers 1-3 will ALWAYS (99.9% of the time) be on there corrisponding string. Like your 1 finger will always be on the G string (third string), your 2nd finger will always be on the B (second string) and your 3rd finger will always be on the e string (first string)! Your 4th finger will hardly ever be use so don't worry about it at this point, just curl it up out of your way or you can use to to stabalize your right hand by placing it on the boddy to give some support wile your playing.
But I will explina these more into detail, but it is so frig'n important that you stick to these rules... its for the benifit of your future guitar playing!!!
<=======(===@ gabe
"For perfect practice you must practice perfect"

In Belize

Just a small post here about nothing really... For Christmas my family had a family reunion in Belize, a small country south of Mexico. We did everything you could think of, we snorkled around a huge reef, caught our own lobster and cooked it n the beach with a side of real coconut we had to open, Tubed through huge caves almost as big as a walmart, climbed up stairs of one of the oldest Mayan Temples and zip-lined through the tree tops of a "jurasic park"-like jungle!

Well of course i had to bring my guitar!!!


One thing i learned on this trip among alot of other things but i leaned that you just got to play, play from your heart, play othing at all, but play. Find something that sounds nice and play it forever, over and over, till you get tired of it. Find some chords that sounds good and play them in a sequence over and over. Strumming is such an open book, you can litteraly do anything with strumming. But find where your comfortable with and keep going till you don't have to think about it anymore. Like breathing, or eating... or chewing gum while walking for others, lol. Just get to apoint where you play for you and you love the noises that protrudes from your guitar.
Make it from your heart and play for God if noone else wants to listen b/c i'm sure He wants too!

Am my butt!

Yippy, its the second chord tutorial, lol... moving along slowly but surely.

OK, yall are going to be learning an Am (small "m" is for minor). This is it tabbed out.

(1)e--------------
(2)B---1---------
(3)G---2---------
(4)D---2---------
(5)A-------------
(6)E-------------

Now i color coded it for a reason... Your pointer finger (finger #1 we'll call it) should be pressed on the 2nd string (the B string) at the 1st fret. Your middle finger (finger #2) is placed at the 4th string (D string) at the 2nd fret. And your ring finger (finger # 3) is pressed down on the 3rd string (G string... not the underwear) 2nd fret.

OK, not hard huh. Heres a picture of it just to help out if your still confused, but really try to learn and understand how tabs are written b/c you can't have tons of pitures for every chord you'll come up to when your wanting to learn a new song off the net. So really try to make an effert to understand what i'm trying to get across and how the mechanics of tabs work so you can be able to read as quick as you can the Bearstien Bears!


So this will conclude this tutorial, small and short... but it wasn't that hard to explain, haha. Now yall at least have two chords you can start working on and getting use to swtching back and forth to.

In the next turorial i'll be explaining roots, what they are, what role they play in your uhh, plyaing and why you give the name of a chord that certain letter... All to the best of my ability of course. I am still pretty limited on what I can teach yall b/c I don't know much myself, but what i'm trying to do here is teach anyone and everyone everyhting I know up to this point. And as I learn more I will post it here so everyone can be going at the same pace. Sooner or later i'd love to post videos somehow and put up tabs of songs i'm learning or have written so we can all be learning together and help eachother out... For those few that acually read this, lol...

Well keep workin on those callusses and be patiant, all this takes time.

<======)==@ (sword) gabe

Friday, December 23, 2005

Em is for easy!


I guess we should start out by explaining the strings... There are six strings on a normal guitar, the top string (E) is the thickest string and the thinnest string (small e).

(1)e-------------------
(2)B-------------------
(3)G-------------------
(4)D-------------------
(5)A-------------------
(6)E-------------------


^this above is called tab, its an easier way for reading guitar music. Each letter represents each string, the big (6)E being on the bottem (the thickest) and the small (1)e being on the top (the thinnest) and all the strings inbetween in a normal tuning. You should make an effort to memorize and learn these notes and/or names of the strings hardcore! It will totally help you out!!!

pretty simple huh?

(1)e-------------------
(2)B-------------------
(3)G-------------------
(4)D--2-----------------
(5)A--2-----------------
(6)E-------------------

Uh oh!!! What tha heck do thos numbers meen? Nah, simple, this is tabbing a chord. You know those funny metal bars on the neck of your guitar? Thos are called frets, they are very special but we'll get into that later. All you have to know is that when you see those "2"s on the tab, that meens you push down the A and D string on th second fret, or the 4th and 5th string on the 2nd fret. Now make sure your not pressing directly on the frets but inbetween the frets. Heres a picture of wat it will look like.

Oh and by the way this is an Em (small "m" meens minor) chord!


Now you may hear some buzzing and that may be due to you eather: not pushing hard enough, being to far back from the fret, you fingers touching other strings. Don't worry if your fingers hurt, they should. It just meens your fingtips aren't use to the strings yet, but they will adjust and grow calluses wich are pretty cool if you ask me.

So... that wasn't to bad ehh? This will go alot faster as we all get a hang of my teaching style and stuff. Once yall get a hold of readin tabs then this can go so much faster... soon i'll start explaining the bass notes of chords, why they get there name and all that music theory crap! But i'm just keeping it simple fur ya!

But until the next post, practice practice... even though theres one chord, haha... uhh, use google.

<======)==@ (sword) gabe

Intro kinda...


OK, so this is a guitar, well... The body of the guitar... More like the hole of it, the place where the noises come out. Those things that go over the hole are called strings, since this is a classical then they are made of nylon...
Well i'm acually leaving for Christmas to Baliz for a family reunion/christmas thing so i won't be able to post on here or work on this for a wile... Just to fill yall in to whats up.

Fun fun


Ok, this will be my first atempt (if u wana call it that) at writing/posting tutorials on the web. Mostly all the ones that come here know me and know wat i'm trying to do, if you have any questions as to my gaols or just wana get to know the teacher (a.k.a me) then please feel free to email me or message me at any time!